Shipping Container Repair & Maintenance Guide
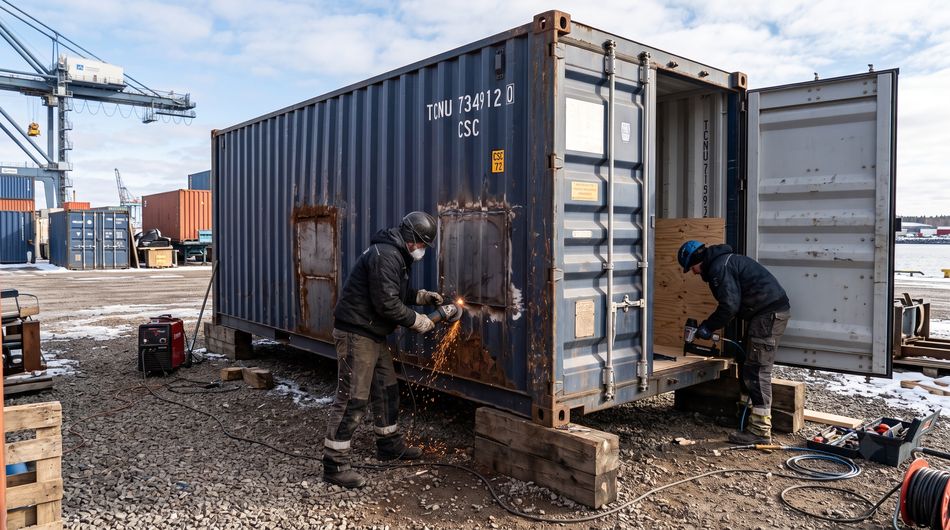
A shipping container is the gold standard of strength and durability. Built from alloyed Corten steel, it is engineered to withstand ocean storms, salt air, and immense loads for decades. However, during prolonged site use, frequent relocations, or after purchasing a used container, owners inevitably encounter wear and tear on the metal structure and mechanical parts.
In this guide, we break down four of the most common issues—door frame misalignment, floor deterioration, severe through-rust, and frozen locking mechanisms—and provide clear, step-by-step algorithms to solve them.
1. Frame Realignment: What to Do When Container Doors Won't Close
One of the most frustrating problems is when the locking bars fail to align with the keepers and the doors jam. In 90% of cases, the issue isn't a warped door panel, but a shifted base diagonal caused by an uneven foundation.
How to Diagnose the Issue
Use a tape measure to check the door frame diagonals (the distance from the top-left corner to the bottom-right, and vice versa). If the difference exceeds 5–10 mm (0.2–0.4 inches), the frame has racked into a parallelogram.
Corrective Steps:
- Leveling the Base. Place a hydraulic bottle jack under the bottom corner towards which the frame is leaning. Jack up the corner until both diagonal measurements match perfectly. Insert rigid steel shims or a solid concrete block beneath the corner casting.
- Addressing Structural Deformity. If the foundation is level but the top header is bowed from an impact, use turnbuckles or hydraulic body repair clamps to pull or push the frame back into shape.
- Hinge and Locking Bar Adjustments. If the frame is square but the locking bars are still stiff, inspect the hinge bushings. If bent, cut out the damaged hinge pin, straighten the lugs, install a new pin, and pack it with heavy grease.
2. Floor Restoration: Plywood, Epoxy, or Steel Plating
Factory shipping container floors consist of 28 mm thick, highly treated marine plywood (often bamboo or keruing). Over time, exposure to standing water, heavy equipment, or spilled oils causes the layers to delaminate and rot.
Option 1: Spot Repair and Sealing (Budget-Friendly)
For localized damage:
- Cut out the rotted section of plywood using a circular saw, making sure the cut stops precisely over the center of the underlying steel crossmembers.
- Treat the exposed steel floor joists with a rust converter and anti-corrosive primer.
- Cut a matching patch from marine-grade or exterior plywood of the exact same thickness.
- Seal the edges and joints with an epoxy resin mixed with sawdust, and secure the patch with self-tapping metal screws.
Option 2: Full Replacement with Diamond Plate (Heavy-Duty)
For workshops, garages, and heavy-storage units, it is best to completely strip the plywood and weld down 3–4 mm steel diamond plate (checker plate) or aluminum sheet. Weld the plates continuously or with heavy stitch welds, prime the surface, and seal all seams. This creates a permanent floor resistant to heavy loads and chemical spills.
3. Fixing Through-Rust: Welding vs. Rivets
While Corten steel forms a protective oxide layer, deep scratches combined with trapped moisture will eventually cause rust holes.
Method A: Permanent Repair (Welding)
This is the only acceptable method for structural members (corner posts, bottom rails, and top headers).
- Grind the area around the hole down to bare metal using a flap disc, extending 3–5 cm (1–2 inches) beyond the rust damage.
- Cut out the compromised metal in a clean rectangular shape.
- Fabricate a patch from sheet steel (1.5 to 2 mm thick) with a slight overlap.
- MIG/MAG weld the patch fully into place.
- Grind the weld seam flush, apply a zinc-rich cold-galvanizing primer, and finish with an epoxy or polyurethane topcoat.
Method B: Quick Field Repair (Rivets + Adhesive Sealant)
If a hole appears on a non-structural corrugated side wall or roof panel and welding equipment is unavailable:
- Cut a patch from galvanized steel sheet with a 3–4 cm overlap.
- Clean and degrease the surrounding surface thoroughly.
- Apply a heavy bead of polyurethane or MS-polymer sealant around the hole. Avoid standard silicone sealants—they release acetic acid, which accelerates rust!
- Press the patch into the sealant and secure it along the perimeter using blind pop rivets spaced 3–5 cm apart.
4. Protecting Locking Mechanisms and Hinges for Winter
During freezing weather, water trapped inside hinge bushings, door gaskets, and locking cams turns to ice, making opening the container a severe challenge.
Autumn Maintenance Checklist:
- Lubricating Moving Parts. Avoid light spray lubricants like WD-40, as they wash away quickly and dry out moving joints. Use grease fittings or a syringe to pack the hinge pins and locking bar bushings with a water-resistant grease (such as lithium grease with molybdenum disulfide or marine-grade calcium grease).
- Conditioning Gaskets. Rubber door seals harden and freeze to the steel frame in winter. Clean off dirt and apply a generous coat of heavy silicone grease. This preserves rubber flexibility and prevents the doors from freezing shut.
- Protecting Locks. Shield padlocks from direct rain and snow. Install a steel lockbox enclosure, which simultaneously deters angle-grinder break-in attempts and keeps precipitation out of the padlock cylinder.
How to Unfreeze a Jammed Lock
Never strike the locking bars with a sledgehammer, as this will bend the guide brackets. Use a heat gun or an alcohol-based lock de-icer spray, and immediately follow up with a moisture-displacing lubricant once thawed.


